Clockify Timesheet: Track Field Workers Activity
With the Clockify Dispatch for Ubiqod, you can send clock in and clock out data collected with Ubiqod in the field (QR codes, NFC clocks, hand-free clocking, Digital Timesheet, etc.) to Clockify, a time tracking cloud software.
The clockify timesheet will be automatically filled with the Ubiqod data, in real time.
Additionally, the free Clockify App for Ubiqod helps to manage PIN codes, badge lists, and sites directly in the Clockify backend.
Send Data to Clockify Timesheet
To send data to your Clockify account, go to the Dispatch menu, press the +CREATE button, and select Clockify
Select an existing Clockify connection or press the + button to configure one.
Connection name
Naming the connection can be useful for easily identifying it among multiple Clockify accounts.
Clockify Data region
Select the data region of your Clockify instance. If you don’t remember the region you chose when you created your account, check your Clockify URL (app.clockify.me = worldwide). If you are using a dedicated subdomain, check the corresponding option and enter your custom subdomain.
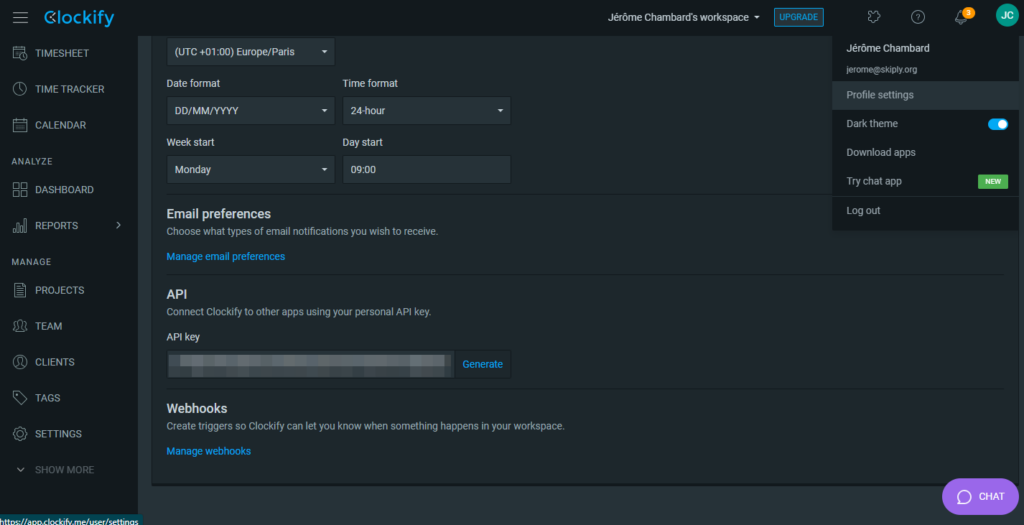
API Key
Your Clockify API key is available in the profile menu of your account:
Clockify configuration & plans
Activate timesheet
You need to activate the Timesheet in the Clockify settings.
Add Time for Other
By default, when you are using you clockify api key, the system will clock in and out for yourself only.
If you want to add time for your employees, you need the “Add Time for Other” feature, accessible from the Basic Plan of Clockify.
Use Clockify Timesheet App for Ubiqod
The Clockify App for Ubiqod will help you match sites with tags (useful for reporting), PIN codes, and badge lists with users.
Install the Clockify Timesheet App
To install the App:
- Click on the puzzle icon in the top right of your Clockify backend.
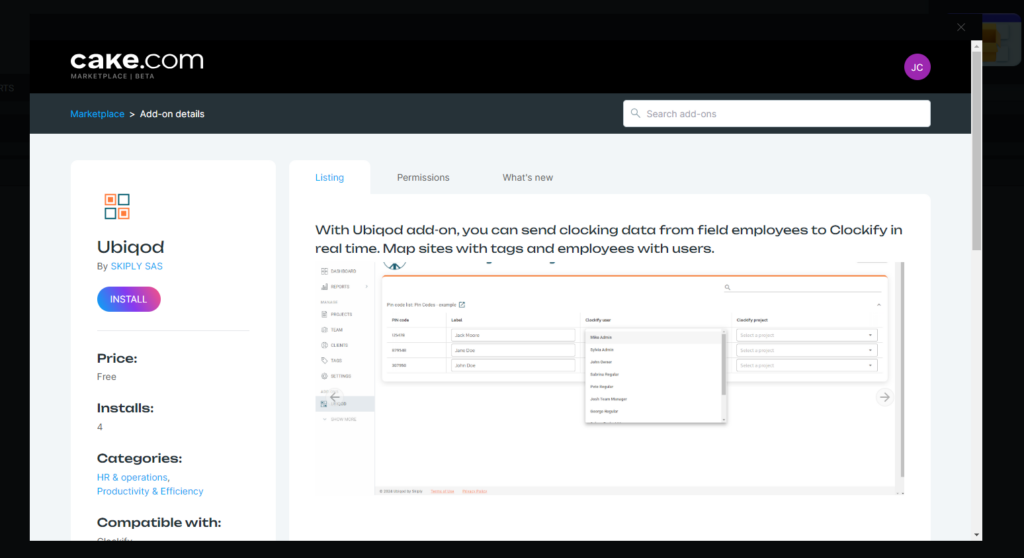
- Browse Marketplace.
- Search for Ubiqod.
Click on the Install button and follow the instructions:
Refresh your page
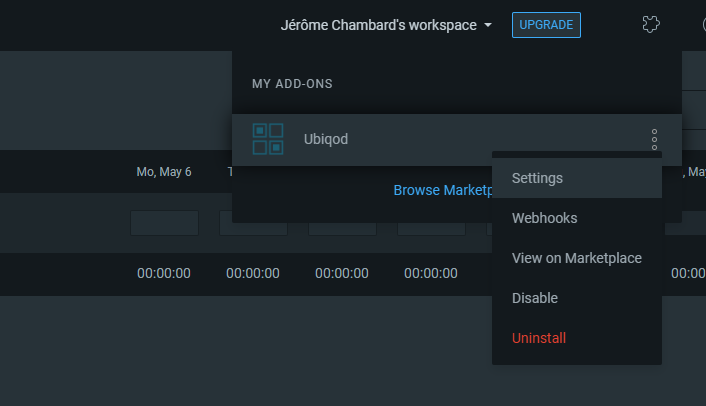
Now, you should see Ubiqod in the Add-ons left menu.
Link your Ubiqod Account in Clockify
In Clockify, in the Add-ons tab of the setting menu, click on the 3 vertical points and select settings:
You should see this:
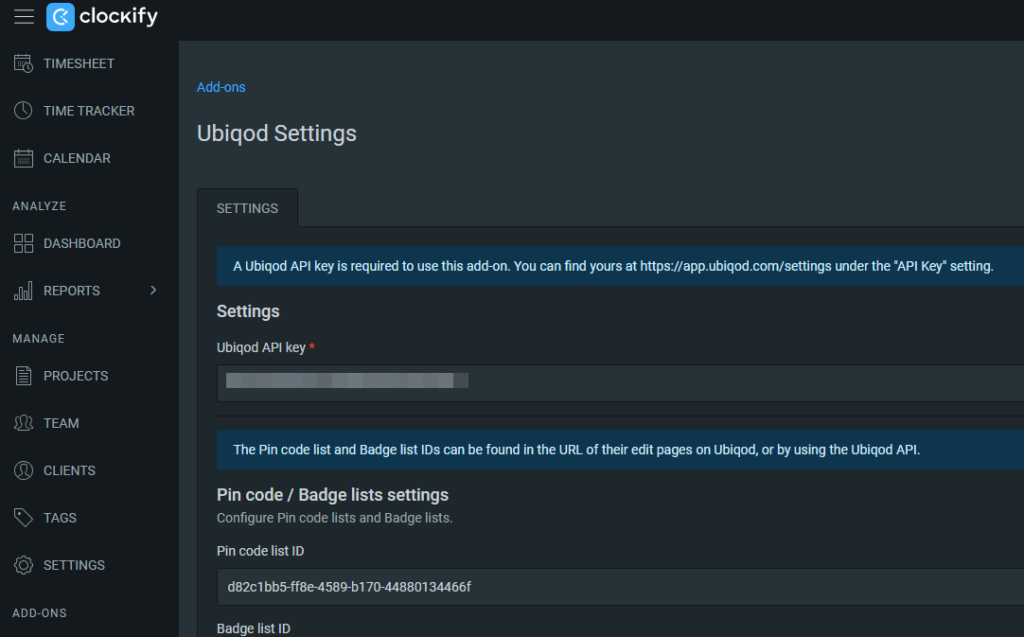
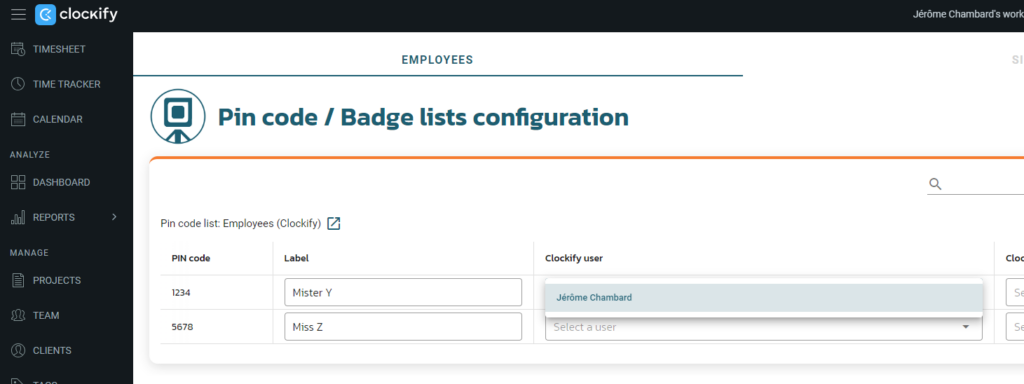
Enter your Ubiqod API key. Optionally, you can link a PIN codes or badge lists. This feature will allow you to associate a badge number or a PIN code to a Clockify user.
Click on the Ubiqod menu in Clockify (on the left): now you can make associations between Ubiqod sites and Clockify tags, or between PIN codes, badges and employees. You can even associate an employee to a Clockify project:
If you see an error, try to refresh the page before checking if the API Key is correct.
Try Ubiqod
Get 100 free credits to start building with Ubiqod: sign up here
Related Articles
Track On-Site Attendance in Google Sheets with Taqt Timesheet
This article shows how to implement a simple QR-code-based staff check-in system using the Ubiqod platform and the free Taqt Timesheet app for Google Sheets. Prerequisites A Ubiqod account – You can sign up here and get 100 free Credits to test. A ...Proof of Presence: How to Track Field Activity with Ubiqod
What is proof of presence? Proof of presence is a verified, timestamped record confirming that a person was physically at a specific location at a specific time. It is commonly used by cleaning companies, security firms, facility managers, and field ...Track Item Status In monday.com (QR codes)
With Ubiqod, you can track the status of a monday.com item using QR codes. Watch this video to learn how to achieve this. The Ubiqod platform evolves frequently. Don't worry if the interface looks different in the video—the principles remain the ...What is a Dispatch in Ubiqod?
What is a Dispatch? In the Ubiqod platform, a dispatch enables real-time transmission of data collected from user interactions—such as pressing a connected button, scanning a badge, or submitting a form after scanning a QR code—to third-party ...Visualize data with View
The Ubiqod platform enables you to configure QR codes and connected devices (called trackers) to monitor field activity. All configuration tools are centralized in a workspace called Build. To visualize data, you must access the View workspace. It ...